How To Make Strozzapreti Step By Step

I must admit that although I love just about any well-prepared pasta dish, I am particularly fond of handmade artisan pasta shapes such as this one. There is just something about starting with flour and water and ending up with a delicious pasta dish that is so satisfying.
This particular pasta is called strozzapreti, which is translated as “priest choker”, or “priest strangler”. How the name originated is widely debated, one story being that glutenous priests ate so quickly that they choked themselves. Another theory is that a homemaker was in such a rage when making pasta that she choked the pasta dough when making it. Wherever the name came from, this is a rustic pasta that works well with chunky sauces.
This pasta shape is typical of the Emilia-Romagna, Tuscany, Marche and Umbria regions of Italy as well as in the state of San Marino, although each region has its own specific recipe for the dough. Just to confuse matters, in some regions, strozzareti are gnocchi-like dumplings made of ricotta cheese and spinach. This recipe is for the pasta version of strozzapreti that resemble short pici pasta, a hand rolled pasta famous in Tuscany.
I did a lot of research before endeavoring to make my strozzareti dough, wanting to ensure that it held up well to cooking, could handle a hearty sauce, but was still tender to the bite. I decided to combine all-purpose flour with some semolina flour that I moistened with warm water, and used no eggs in my dough. You will find recipes for this pasta using both eggs and egg yolks, but I wanted a more rustic pasta, so I decided to forgo the eggs.
This pasta is very easy to assemble, and the one comment I want to stress is that you allow the kneaded dough to rest a minimum of thirty minutes before you use it. This step allows the dough to relax making it much easier to roll out to the proper thickness.
As I previously stated, this pasta works well with chunky sauces, whether they are vegetable or meat based. In my photos, I elected to use a quick and easy creamy sausage sauce that worked extremely well with my pasta. This pasta will cook in just a few minutes, so test after a couple of minutes to ensure your pasta is perfectly “al dente” before you drain out the water. You do not want to end up with mushy pasta after all the effort you have put in making hand rolled pasta!
You Will Need:
1 3/4 Cups All-purpose Flour
1 Cup Finely Ground Semolina Flour
1/2 Teaspoon Salt
Warm Water
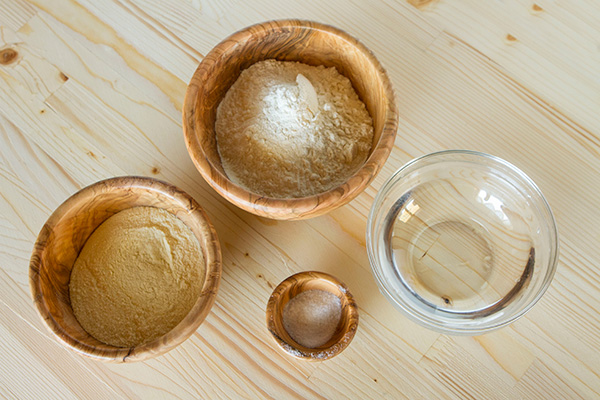
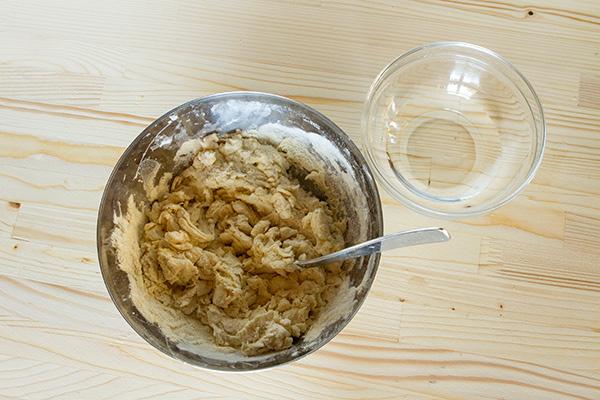
In a mixing bowl, stir together your two types of flour and the salt. Slowly drizzle in the warm water stirring with a fork until your dough begins to clump together.
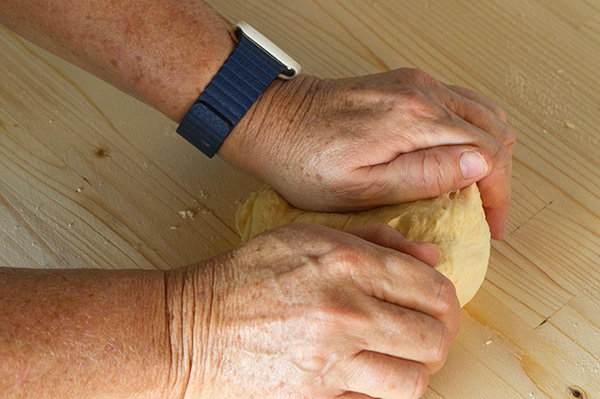
Dump your dough out onto a lightly floured surface and knead by hand for about 4 to 5 minutes or until your dough is smooth and elastic.
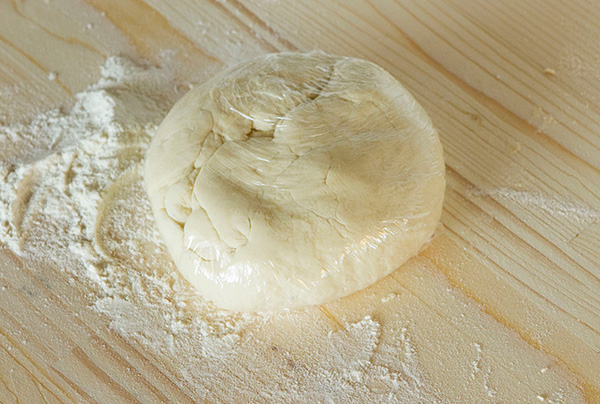
Wrap your dough in plastic wrap and let rest at least 30 minutes or up to an hour.
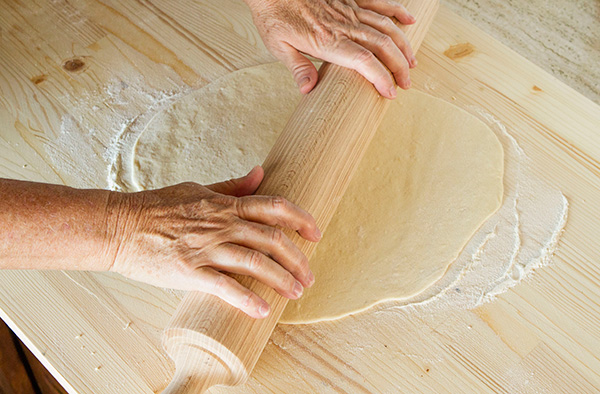
Divide your dough into two pieces. Keep the second piece of dough wrapped in the palstic while you work on the other. Shape your dough into a flat disk, and on a lightly floured surface roll the dough to a thickness of about 1/3 of an inch. I find the easiest way to roll the dough is to roll the pin up and down, then turn the dough 1/4 turn and roll agin. Keep repeating this process, lightly dusting the dough with flour if it begins to stick, until you reach the desired thickness.
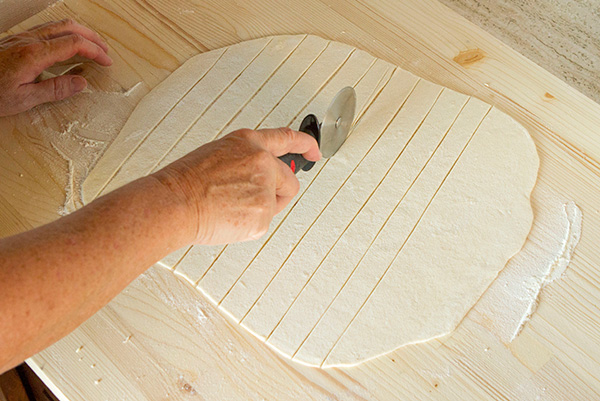
Use a pastry or pizza cutter to cut your dough into 1 to 1 1/2 inch strips.
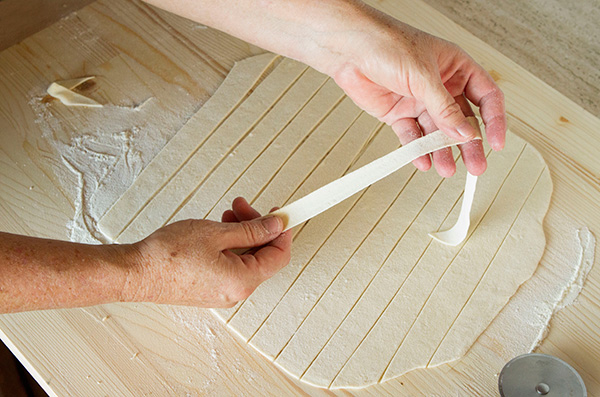
Pick up one strip and gently stretch slightly with your fingers.
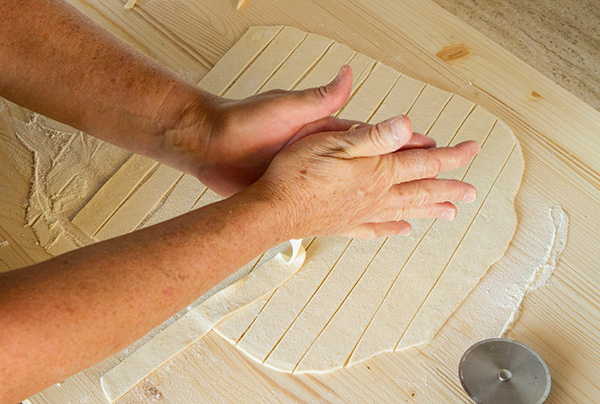
Place the strip between the palms of your hands, and gently rub back and forth to twist the dough into a tube like shape. Once you have shaped the top of the strip, tear it off and continue rolling the rest of the strip. I use the width of my closed fingers (about 4 inches) when measuring the length of the completed rolled dough.
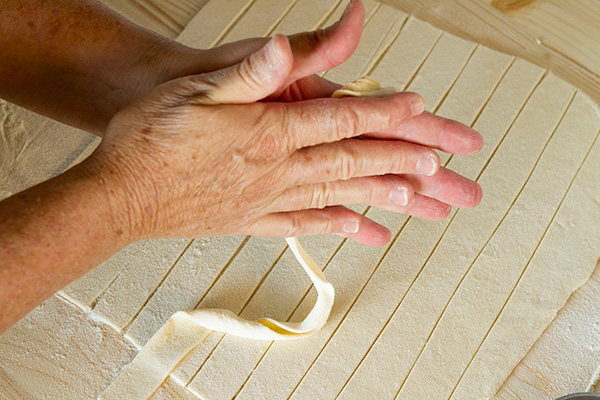
Continue to roll and tear the remaining strips of dough, then drop the finished strozzapreti onto a lightly floured baking sheet. Complete the same process with the other half of the dough.
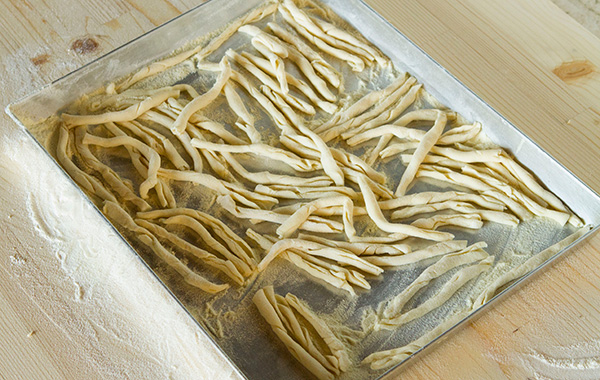
Lightly dust the completed strozzapreti and refrigerate until needed.
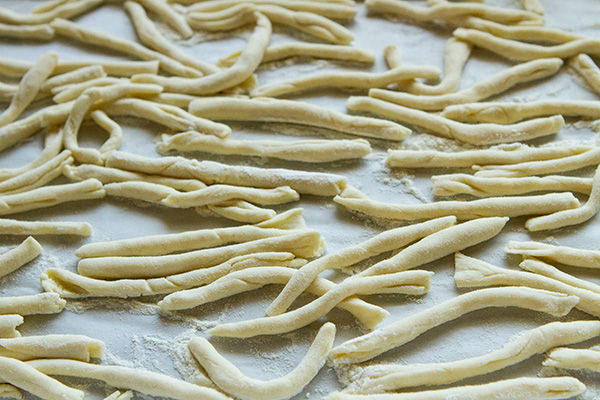
If not using the strozzapreti, you can also freeze them. Place them on a waxed paper lined baking sheet in the freezer. Once frozen, place the strozzapreti in an airtight bag until needed.
Do not thaw the frozen strozzapreti before cooking, simply add an additional minute or two for cooking. Prepared strozzapreti should be cooked in a large pot of lightly salted boiling water. The pasta is cooked when it rises to the top of the pot. My strozzapreti took about 4 minutes to cook “al dente”.

Use a chunky sauce for this pasta shape. I used my Easy, Creamy, Spicy Sausage Pasta Sauce.
Buon Appetito!
Deborah Mele
How To Make Strozzapreti Step By Step
Ingredients
- 1 3/4 Cups All-purpose Flour
- 1 Cup Finely Ground Semolina Flour
- 1/2 Teaspoon Salt
- Warm Water
Instructions
- In a mixing bowl, stir together your two types of flour and the salt. Slowly drizzle in the warm water stirring with a fork until your dough begins to clump together.
- Dump your dough out onto a lightly floured surface and knead by hand for about 4 to 5 minutes or until your dough is smooth and elastic.
- Wrap your dough in plastic wrap and let rest at least 30 minutes or up to an hour.
- Divide your dough into two pieces. Keep the second piece of dough wrapped in the palstic while you work on the other.
- Shape your dough into a flat disk, and on a lightly floured surface roll the dough to a thickness of about 1/8 of an inch.
- I find the easiest way to roll the dough is to roll the pin up and down, then turn the dough 1/4 turn and roll agin.
- Keep repeating this process, lightly dusting the dough with flour if it begins to stick, until you reach the desired thickness.
- Use a pastry or pizza cutter to cut your dough into 1 to 1 1/2 inch strips.
- Pick up one strip and gently stretch slightly with your fingers.
- Place the strip between the palms of your hands, and gently rub back and forth to twist the dough into a tube like shape.
- Once you have shaped the top of the strip, tear it off and continue rolling the rest of the strip.
- I use the width of my closed fingers (about 4 inches) when measuring the length of the completed rolled dough.
- Continue to roll and tear the remaining strips of dough, then drop the finished strozzapreti onto a lightly floured baking sheet.
- Complete the same process with the other half of the dough.
- Lightly dust the completed strozzapreti and refrigerate until needed.If not using the strozzapreti, you can also freeze them.
- Place them on a waxed paper lined baking sheet in the freezer.
- Once frozen, place the strozzapreti in an airtight bag until needed.
- Do not thaw the frozen strozzapreti before cooking, simply add an additional minute or two for cooking.
- Prepared strozzapreti should be cooked in a large pot of lightly salted boiling water.
- The pasta is cooked when it rises to the top of the pot. (My strozzapreti took about 4 minutes to cook “al dente”.)
- Use a chunky sauce for this pasta shape.
I’m gonna try it.
Can Farina 00 be use for strozzapreti instead of semolina?
The semolina adds body to the dough. Tipo “00” would create a much lighter dough but you could try it.
Thank you Deborah!
I am inspired by your method for Strozzapreti and will try it very soon.
Thank you for sharing your cooking and traveling experiences. Especially now, as you are busily getting ready to leave Italy for the winter. We will be arriving in Naples on November 1 to experience Puglia for 17 days for the first time. Your travel notes were very insightful in our plan on where to eat and where to visit.
Thank you again for your generous sharing. Grazie and Ciao, William & Joan
Thanks William, glad I could help.
I’d love to try these, but am confused on one step; is each strip torn in half after forming? If yes, then why not first horizontally cut each strip before forming? Thank you ?
You could, it really doesn’t make a difference.
Can this recipe be doubled?
Certainly!
Oh, this made me hungry just looking at your page. Gotta try this soon. 🙂